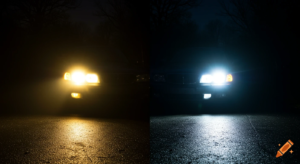
Factory halogen headlights served the automotive industry well for decades, but by modern standards, they fall short. They produce a dull yellow beam, consume significant power, and wear out quickly. Upgrading your car’s factory halogen headlights to modern plug-and-play LED bulbs is one of the easiest and most impactful DIY vehicle upgrades you can perform.
A quality LED headlight conversion elevates your night driving experience by casting a crisp, bright white beam far down the road while drastically reducing electrical strain on your alternator.
If you are ready to tackle this project yourself, this comprehensive step-by-step guide will walk you through the entire conversion process—from selecting the correct bulb size to adjusting your beam alignment for maximum visibility and safety.
Pre-Installation Check: Tools and Preparation
Upgrading to LED headlights requires minimal equipment, but proper preparation ensures a smooth, trouble-free installation.
1. Identify Your Bulb Socket Size
Vehicle headlights use specific standardized socket sizes (such as H1, H4, H7, H11, 9005, 9006, or 9005/HB3). Check your car’s owner manual, look at the stamping on your existing bulb base, or use an online bulb finder tool to order the exact matching LED conversion kit.
2. Gather Essential Tools
- Mechanic Gloves: Keeps oil off the glass and protects hands from tight engine bay spaces.
- Flathead & Phillips Screwdrivers: For removing air boxes, trim clips, or dust covers if necessary.
- Zip Ties: To secure external LED drivers and loose wiring neatly inside the engine bay.
- Microfiber Towels & Isopropyl Alcohol: For cleaning lens surfaces and bulb connections.
Safety Warning: Ensure your car engine is turned off, key removed from ignition, and headlights switched off for at least 15–20 minutes prior to installation to allow old halogen bulbs to cool down completely.
Step-by-Step LED Headlight Installation Guide
[Remove Halogen Bulb] ──> [Install LED Locking Collar] ──> [Insert & Lock LED Bulb] ──> [Connect Harness] ──> [Test & Seal]
Step 1: Access the Headlight Housing
Open your vehicle hood and locate the back of the headlight assembly inside the engine bay. On some cars, access is wide open; on tighter engine bays, you may need to temporarily unclip the air intake box, washer fluid reservoir, or plastic engine covers to gain comfortable access.
Step 2: Remove the Factory Dust Cap & Unplug Wiring
Remove the rubber or plastic dust cover sealing the back of the headlight housing. Carefully press the locking tab on the factory wiring harness plug and pull it away from the old halogen bulb.
Step 3: Remove the Old Halogen Bulb
Depending on your headlight assembly type:
- Metal Clip Retainer: Unhook the wire spring clip holding the bulb collar in place and swing it open.
- Twist Lock: Rotate the halogen bulb a quarter-turn counter-clockwise and gently pull it straight out of the housing.
Step 4: Install the LED Bulb (Collar First Method)
Most premium LED headlight bulbs feature a removable mounting collar (locking ring).
- Detach the aluminum collar ring from the new LED bulb body.
- Insert the collar ring into your car’s headlight socket housing and lock it in place using the factory metal wire clip or twist-lock mechanism.
- Slide the LED bulb body through the center of the locked collar ring.
- Push and twist the bulb slightly until it clicks firmly into place.
Critical Alignment Tip: Ensure the LED microchip faces horizontally (3 o’clock and 9 o’clock positions). If the chips face up and down (12 and 6 o’clock), your light beam will scatter dangerously and create dark blind spots on the road.
Step 5: Connect the Wiring Harness & CANbus Driver
Plug the LED bulb harness directly into your car’s original factory bulb socket.
- Check Polarity: LEDs are polarity-sensitive (+ and – poles matter). If the LED fails to light up after connecting, flip the plug 180 degrees and reconnect it.
- CANbus Adapters: If your modern European or American car throws a “Bulb Out” dashboard error or experiences flickering, connect an inline CANbus anti-flicker decoder module between the factory socket and the LED bulb.
Step 6: Tuck Wires and Reinstall the Dust Cap
Neatly coil all excess wiring and small inline LED driver boxes inside the headlight cavity. Ensure the rear cooling fan or heatsink on the back of the LED bulb has at least 0.5 to 1 inch of breathing clearance inside or outside the dust cap to dissipate heat efficiently. Seal the housing securely with the factory dust cover.
Step 7: Test and Adjust Headlight Alignment
Before driving out into the dark, verify your beam alignment:
- Park your car 25 feet away from a flat garage door or wall on level ground.
- Turn on low beams and mark the horizontal top cutoff line of the light beam on the wall with tape.
- If the beam shines too high (aimed into oncoming drivers’ eyes) or too low (illuminating only the immediate bumper area), use the vertical adjustment screws located on top of the headlight housing to align the cutoff line properly.
Common Troubleshooting Tips
| Issue | Potential Cause | Easy Solution |
| LED Light Doesn’t Turn On | Reverse Electrical Polarity | Unplug harness connector, flip it 180 degrees, and reconnect. |
| Flickering or Dashboard Error | Vehicle CANbus System Sensitivity | Install an inline CANbus resistor/decoder module kit. |
| Scattered Beam / Poor Distance | Incorrect Bulb Orientation | Rotate bulb inside housing until chips face 3 o’clock and 9 o’clock. |
Conclusion
Upgrading your factory halogen headlights to modern LED headlights is a budget-friendly DIY project that drastically improves night driving clarity, safety, and modern curb appeal. By following proper installation techniques, ensuring horizontal chip orientation, and verifying beam alignment, you can enjoy maximum visibility on every nighttime journey.